
Half of the fun of playing any open-world game is exploring the world. So far, there is not much to explore in our minimum viable voxel world. Let's change that.
In the previous part, we explained how every block in the world is represented as an entity with Item and Position components - but that's only a half-truth. Block entities placed by users can be represented this way, but storing every terrain block of an infinite procedurally generated world is not feasible. Instead, we need to represent the generated terrain with a pure function that takes a coordinate as input and returns the type of block at that coordinate. The client uses this function to render terrain, and the Mine system contract uses it to verify that the caller is attempting to mine a valid block. Let's go over the steps to create such a function.
Step 1: Perlin noise
Every respectable procedural terrain generation algorithm starts with Perlin noise, a gradient noise algorithm developed by Ken Perlin in 1983. Unlike uniform noise, in which each point's value is random and independent, Perlin noise produces smoother patterns where each point's value is random but similar to neighboring points' values.

Comparison of uniform noise to Perlin noise.
We need a high-performance implementation of Perlin noise in WebAssembly for the client renderer and we need a matching implementation in Solidity for the contracts. Fortunately, MUD contains both!
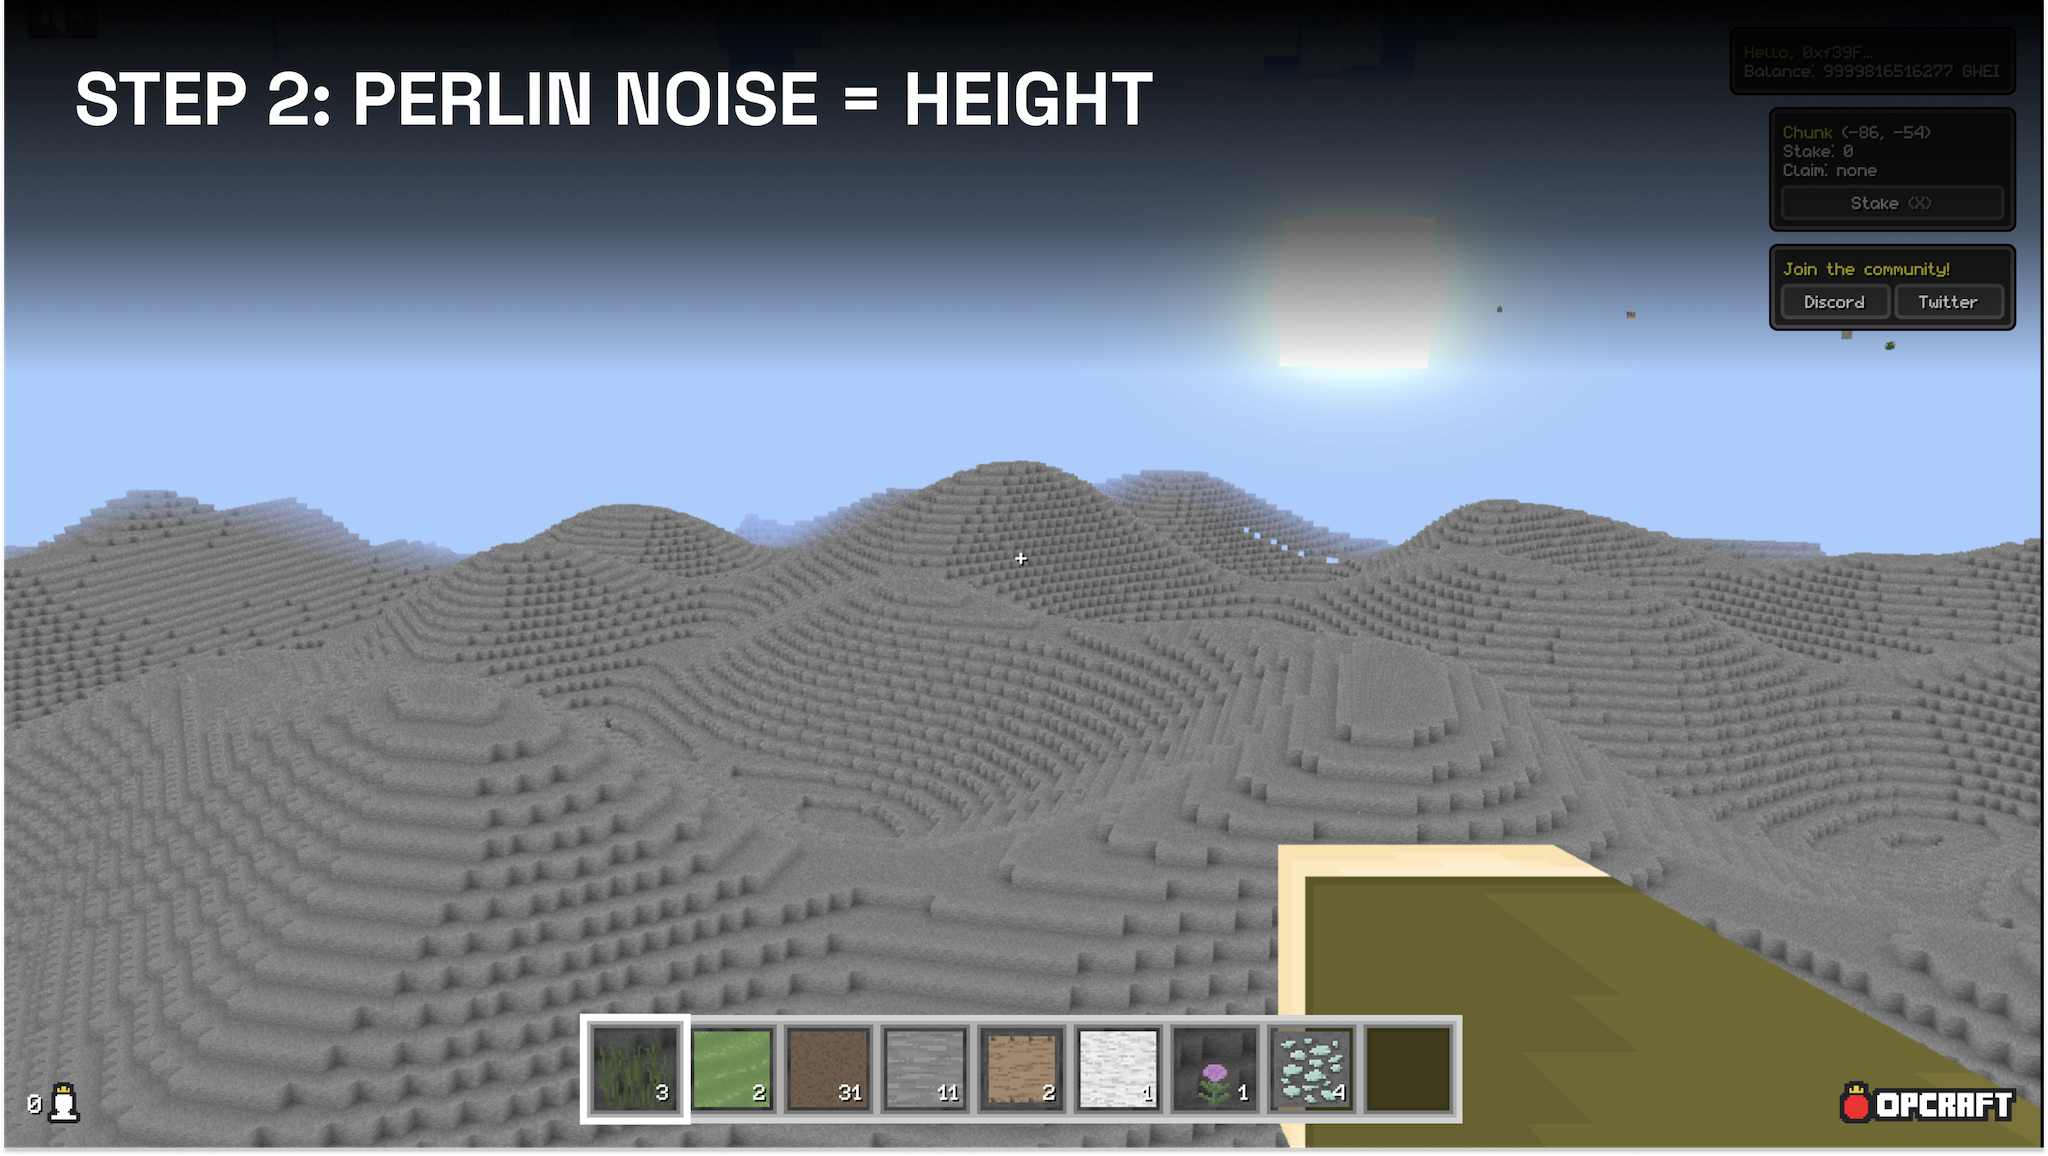
Step 2: Height map
Mapping the Perlin output directly to a height map produces an infinite terrain, albeit not a very exciting one.

An infinite landscape generated by mapping the output of a Perlin noise function directly to the height map.
Step 3: Continents and oceans
First, let's create some larger continents and oceans. For this, we scale up the Perlin noise and add a rule to turn blocks above the height map but below 0 into water.

Increasing the Perlin scale and setting the sea level to height 0 creates large oceans and continents
Step 4: Hills and valleys
Oceans make the landscape more interesting, but continents are just smooth hills. Let's add more hills, valleys, and details. This is where octaves come into play. Just like sine waves with different frequencies and amplitudes can be layered to create more diverse patterns, we can do the same with Perlin noise.

Octaves example: layering sine curves with different frequencies creates more interesting patterns.

Just like sine curves, we can layer Perlin noise with different amplitudes and scales to create more interesting, nature-like patterns.
The more octaves we add, the more details we get, but the more expensive computing the terrain becomes (time to compute on the client and in gas on the contracts). One medium-scale octave for hills and valleys and one small-scale octave for additional details is a good compromise between interestingness and computational cost.

The terrain resulting from Perlin noise with three octaves mapped to the height map looks much more realistic already.
Step 5: Biomes
To make things more exciting, let's add some biomes. For this, we create two more Perlin, call them "heat" and "humidity", and define four biomes using them.

Every coordinate is assigned a heat and humidity value, from which a biome vector is computed.
From these Perlin functions, we can assign a heat and humidity value to every coordinate in the world and then compute a biome vector based on the biome matrix. The highest value in the biome vector is considered a coordinate's biome.

To visualize biomes, we render the terrain with each block type corresponding to its biome.
Next, we want to scale the height map based on biomes. For this we introduce a new concept: spline point interpolation. Instead of using the Perlin noise as height map directly, we use spline points to create a function per biome that maps the height map to a different value.
For savanna, forest, and desert biomes, the spline function flattens the height map in varying degrees; for mountain biomes, it amplifies hills. A coordinate's height scaling is influenced proportionally by each value in the coordinate's biome vector to avoid abrupt and discontinuous changes in elevation between biomes.

Examples of spline functions mapping raw Perlin input to different outputs.

The resulting terrain after scaling the height map with spline functions based on biomes.
Step 6: Rivers
What would be a world without rivers? To add rivers, we create another layer of Perlin, that we transform using a spline function. Raw Perlin noise creates a hilly texture with values between 0 and 1, but for rivers, we are interested in the areas with values around 0.5 between hills and valleys. So our spline function maps values around 0.5 to 0 and close to 0 or 1 to 0.5.

Using a spline function, we can map raw Perlin noise to a river-like structure.
Finally, we subtract the resulting values from the previous height map to carve our river beds. With the existing rule of water occurring at coordinates below 0 but above the height map, the river beds get filled with water.

The resulting terrain after adding rivers.
Step 7: Special blocks
Our terrain doesn't look naked anymore, but something is still missing - special blocks like plants and ores. A simple way to define the location of special blocks is to compute a coordinate's hash and place a special block if the value is in a pre-defined range. Because flowers can only appear above ground, a 2D hash is sufficient, while we can use the 3D hash for ores.
In addition, we can change the threshold per biome to make some special blocks more likely to appear in some biomes.

The hash of a coordinate determines whether a plant grows there or not.
Step 8: Trees
As a final touch for our procedurally generated terrain, let's add some larger structures like trees. Remember, we want to represent the terrain in a function that takes in one coordinate and outputs the block present at this location. Fitting larger structures in this function is more tricky because the location of the blocks within the structure doesn't depend solely on the coordinate of the block.
The trick to get around this is to define a "structure grid". Each block coordinate belongs to one cell of the structure grid. Whether a grid cell's coordinate hash is below a pre-defined threshold determines whether this cell contains a structure (and which structure).

We define a structure chunk to enable structures larger than a single coordinate in a pure function.
If the grid cell contains a structure, we can then determine the block type at a given coordinate within the cell by checking a pre-defined voxel model of the respective type of structure.

If a chunk contains a structure, the position of the individual blocks within the chunk is well-defined.
The result is a pure function that can render the terrain client side and verify the occurrence of a given block at a given coordinate contract side. You can see the generated terrain in action at opcraft.mud.dev!
Links and acknowledgements
Thanks to 0xhank, biscaryn, CipherSovereign, frolic, and ludens for feedback on this article.
You can find the full source code of OPCraft’s procedural on-chain terrain generation on GitHub.
Watch a talk version of this blog post on YouTube!
Continue with Part 3: What happened in two weeks of OPCraft.